Placement Editor: The Art Director of Your Creativity
"Stop choosing between speed and control. The Placement Editor gives you both. While Printify forces you to adjust every product manually, Listybox lets you perfect one placement and then apply that art direction to hundreds of products instantly. It's the difference between being a laborer and an art director.”

Automation is Powerful. Control is Priceless.
The Creation Wizard in Listybox gives you incredible speed, applying hundreds of designs to hundreds of products in seconds. But sometimes, perfection is in the details. A design placed slightly off-center on a t-shirt versus perfectly aligned over the left chest can be the difference between a "generic" product and a "brand" statement.
Every seller who has used platforms like Printify knows the soul-crushing chore of manually adjusting the placement for every single product, one by one.
The Placement Editor was designed to eliminate this chore while giving you complete artistic control. It is your personal art director, combining the speed of Listybox's automation with the precision of your creative vision.
How It Works: Pixel-Perfect Control, Light-Speed Scale
In the Creation Wizard, after you've combined your designs and products, you move to the "Creations Preview" tab before clicking "Create Creation." This is where the magic begins.
Preview & Quick Settings: You see a list of every "creation" (design + product combination) that will be generated. Next to each one, you have modes to determine how the design is placed:
Bulk Actions: Have hundreds of creations and want them all to have the same placement? Select them all, and with a single click, apply "Fit" or "Cover" mode to the entire batch. In minutes, the placement for hundreds of products is set.
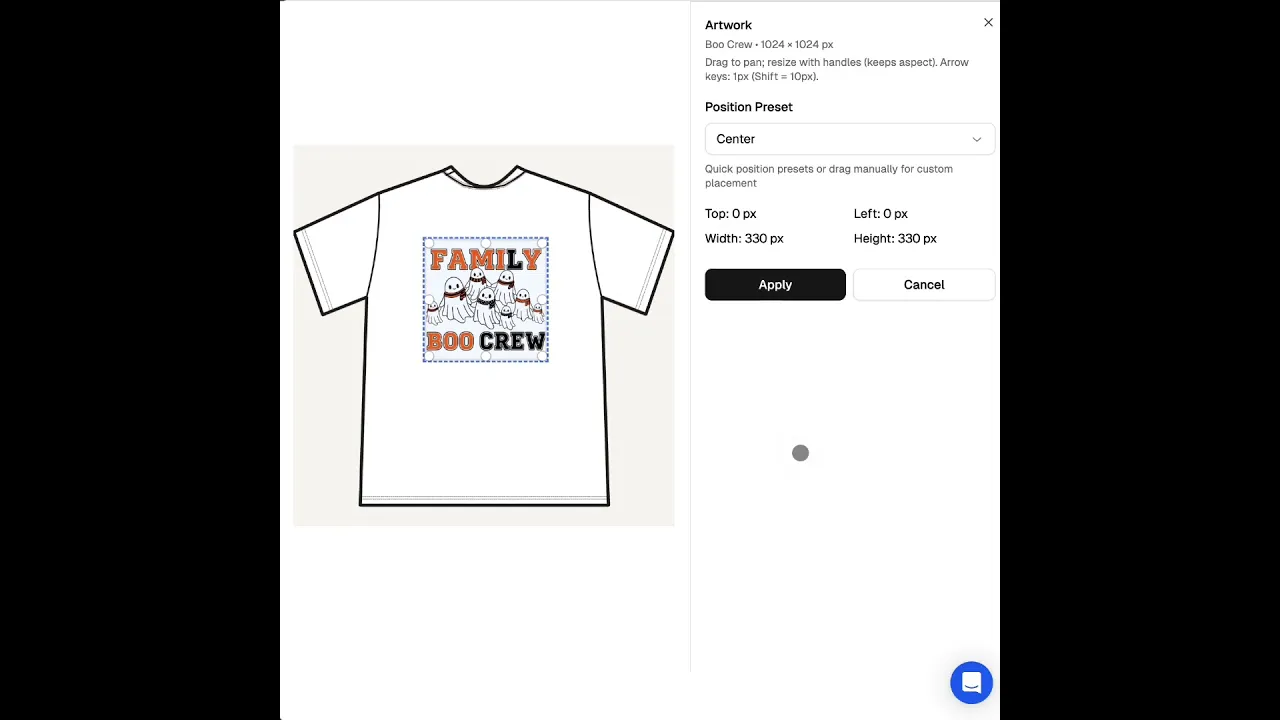
Manual Mastery (The Placement Editor): Does a specific creation need a special touch? Click the "Position" button to open the Placement Editor. Here, you can:
This is a screen that Printify users will find familiar, but with one massive difference: on Printify, you must repeat this process for every single product, one at a time. In Listybox, you can apply a precise adjustment you make to all other selected creations with a single click, turning hours of work into seconds.
Pro-Tips: Think Like a Brand Director
Pro-Tip 1: Create a Minimalist Brand Identity
Does your brand have a minimalist aesthetic? Use the Placement Editor to position all your designs on the "bottom right corner" of t-shirts or on the "back of the neck" for sweatshirts. With Bulk Actions, you can apply this rule to hundreds of products instantly, creating a consistent and sophisticated brand identity.
Pro-Tip 2: The "Over the Heart" Strategy
Selling in romantic or heartfelt niches like Valentine's Day or anniversaries? Position your designs with the Placement Editor to be perfectly placed over the heart (left chest area). This small touch can multiply the emotional impact and sales potential of your product. It gives the impression of a professionally curated brand where every detail has been considered for days.
Pro-Tip 3: The "Try and Tweak" Loop
Created a creation but aren't happy with the placement? You don't have to start over. From your creations panel in Listybox, you can reopen the Placement Editor with a single click, make your adjustments, and save it as a new version. This gives you a flexible playground to experiment with different layouts and aesthetics without risk.
The Placement Editor is where automation doesn't restrict you; it liberates you, saving you time so you can execute your creative vision down to the finest detail. It is the perfect fusion of Listybox's "speed" and "control" philosophy.